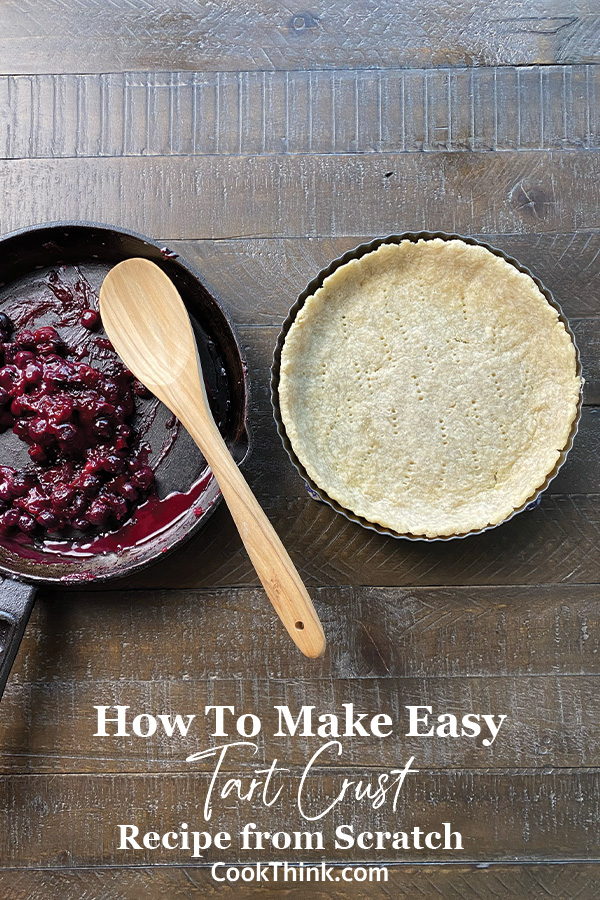
Tart Crust Recipe
Making this tart crust recipe is the perfect crust to go with your homemade tart! You can make this recipe to go with your sweet or savory tart fillings. This versatile tart crust is a great go-to recipe, which I am very excited to show you how to make!

Tart Dough Recipe
This dough recipe to make for a tart crust is similar to that of a homemade pie crust but can be made in two different versions. You may choose to make it sweet, meaning that it contains more sugar, or savory, which is more of a delicious buttery tart crust.
The same ingredients are used, with the addition of powdered sugar in the sweet tart dough. It will depend on your taste preferences as to which type of crust you want to use.
A general rule of thumb is to use the sweet tart dough when you are making more sweet fruit tarts, like an apple tart, blueberry tart, peach tart, or other fruit-filled tart recipe. You might choose to use the savory tart crust recipe when you are making other savory dishes, such as a quiche.
Let’s jump right into the recipe to make the perfect tart crust, by looking at the ingredients you will need to make both types of tart crusts, as well as some helpful equipment you might like to have on hand. Come join me as we walk through the step-by-step instructions!
All-Purpose Tart Dough Recipe
Equipment
Tart Pan
For this recipe, it is best to have a tart pan, with a removable bottom that is 9 inches or 10 inches in diameter. If you are making mini tarts, you can use this recipe to make between 6 and 8 mini tart crusts.
A Food Processor or Pastry Cutter
It’s my preference to use a food processor to make the tart crust. But if you don’t have a food processor, don’t worry! You can also use a mixing bowl, and a pastry cutter to make the tart dough.
A Rolling Pin
Having a rolling pin on hand it a good idea if you want to try and roll the dough out before placing it into the tart pan. This is optional, as you can also press it out after it is in the pan.
Cooking Spray
I would recommend using a bit of cooking spray, to help prevent your tart from sticking to the pan.
Parchment Paper
Using parchment paper to help cover your tart crust while it is baking is a good idea, especially if you are using pie weights to hold the crust in place.
Pie Weights
Pie weights are a special tool that will help your crust stay in place while it is baking. If you don’t have pie weights, a good alternative is to use dried beans.
Baking Sheet
I like to use a cookie sheet or baking sheet to place the tart pan on. This makes for easier access and prevents drips in the oven.
Ingredients for a Tart Shell
All Purpose Flour
You will want to use all-purpose flour for the recipe. Another alternative to regular all-purpose flour is almond flour, if you are looking for a gluten-free alternative. But if you can, all-purpose flour will give you the best results.
Cold Butter
It’s very important that you use cold butter for this recipe. It will help the tart crust recipe turn out the best, rather than using room temperature butter. I like to use salted butter, but you can use unsalted butter if you prefer less salt content.
Salt
You can feel free to use your favorite type of salt for this dough recipe. Regular kitchen salt, iodized salt, or kosher salt will work. You may also use sea salt, real salt, or your favorite type of salt.
Sugar
When it comes to the type of sugar used in this recipe, it will depend on if you are going for the sweet or savory tart crust recipe. For the savory dough, you will only need a little bit of granulated sugar. But if you choose to use the sweet tart crust recipe, you will want to have granulated sugar and powdered sugar on hand. You may use confectioners’ sugar in place of powdered sugar if needed.
Ice Water
When you add water to the crust, you will want to be sure to use very cold water or ice water. It doesn’t actually have to have ice in it, just make sure that it is nice and cold to the touch.
How to Make Crust for Tarts
Step 1: The tart pastry dough
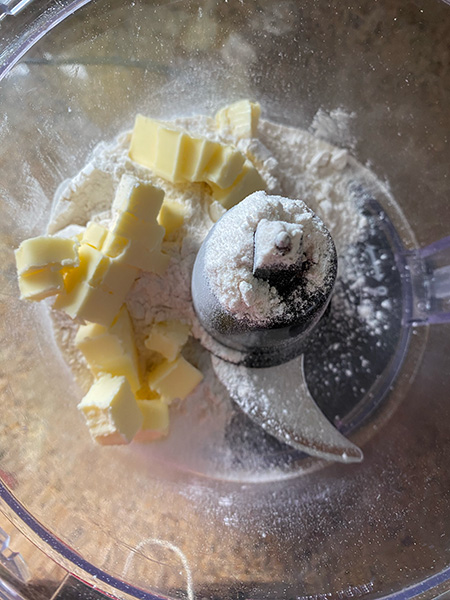
To make the tart pastry dough, begin by adding the flour, salt, and sugar into your food processor, or mixing bowl. Pulse or mix to combine the dry ingredients.
Cut the cold butter into cubes, and add it to your mixture.
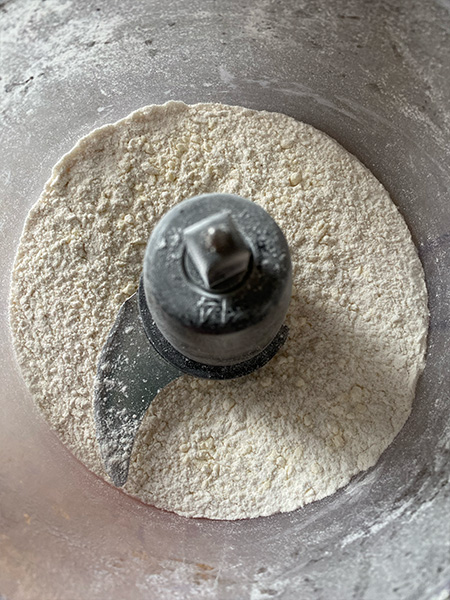
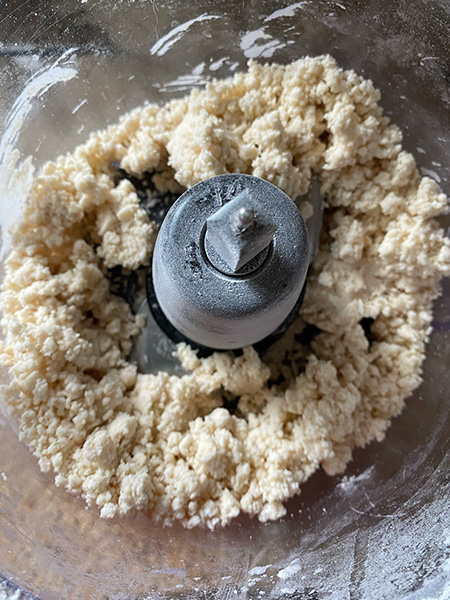
If using a food processor, pulse for a few seconds. Just until the mixture has pea sized clumps in it.
The same applies if you are using a pastry cutter. Cut the pastry dough until your mixture has pea sized clumps in it.
Slowly pour the ice-cold water into the mixture as you mix. Just until the dough begins to come together. Please note, that you may not need to add all of the ice water.
Stop mixing as soon as the dough comes together.
Step 2: Rolling out the pastry
Lightly flour a clean work surface.
Dip your hands in a little bit of flour, and then pick up your tart pastry dough. Gather the dough into a ball and place it on a lightly floured surface.
Sprinkle a little more flour on top, and use the rolling pin, to roll the dough flat.
Step 3: Press the dough into the pan
Spray your tart pan with cooking spray.
Transfer the rolled dough to the prepared tart pan.
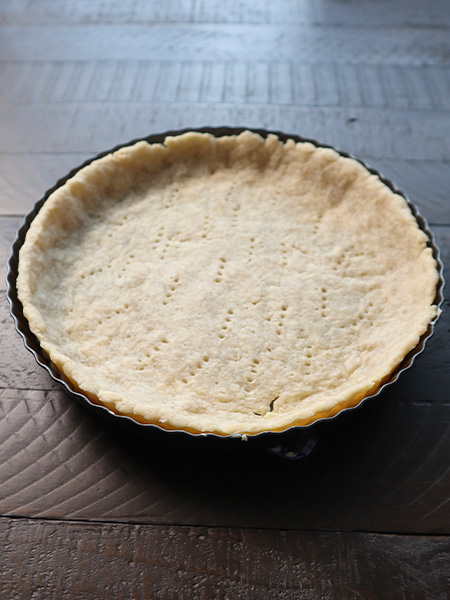
Press the dough so that it sits smoothly against the sides of the pan. Use your fingers to shape it against the sides of the tart pan if needed.
Trim off any excess dough that hangs over the top of the pan.
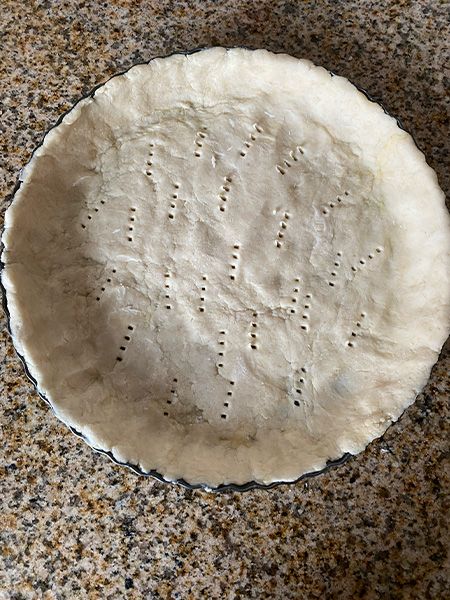
Press the tines of a fork around the bottom of the pan.
Using the press in method, start at the edges and press to fit.
Add dough to the middle and then press smooth.
Alternative Press In Method
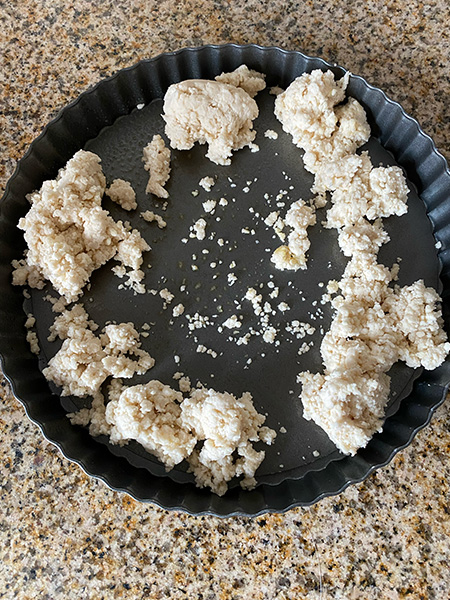
Rather than using a rolling pin to roll the dough out before placing it in the tart pan, you can also add the dough pieces directly to the tart pan.
To do this, you will want to start at the outer edge of the pan, using your fingers to press the crust dough against the ruffled edges of the pan.
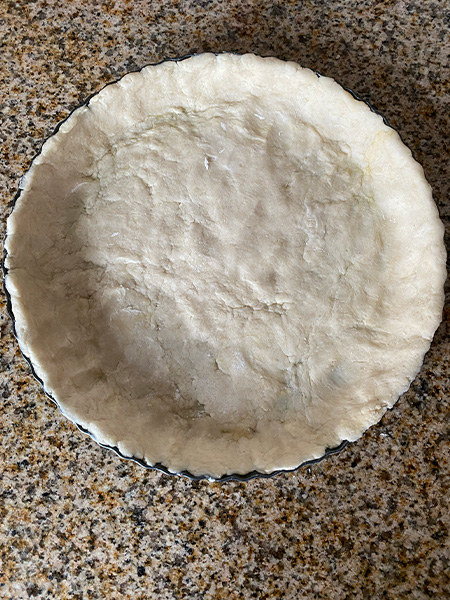
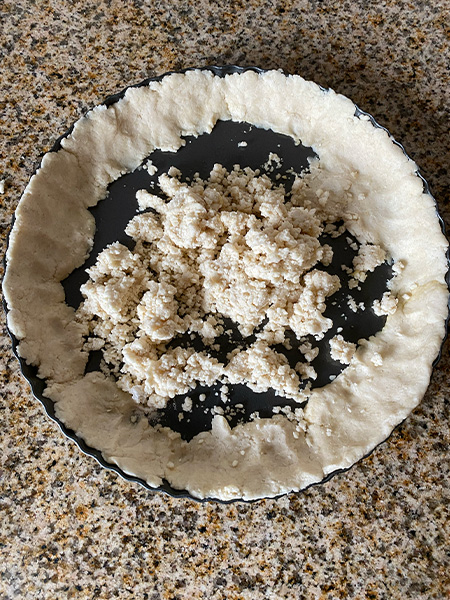
Once you are happy with your edges, add the rest of the pastry dough to the center of the pan. Start by using your hands to press the center flat. Then to finish, use a measuring cup bottom to press the bottom of the crust nice and flat.
To finish the press-in method, poke the bottom of the crust using the tines of a fork.
Step 4: Baking
Preheat the oven to 350°F.
Cover your prepared tart crust with parchment paper, and place pie weights or if you don’t have them, dried beans, over the sheets of parchment paper to help hold the crust in place as they bake. Set the tart pan on a baking sheet.
Tip: if you don’t have pie weights or dried beans, you can bake it without the filling. You will just need to keep a close eye on it so that the edges don’t fall away from the pan. If you see it start to get misshapen, remove it from the oven and use a fork to fix the crust. Put it back in the oven to continue baking.
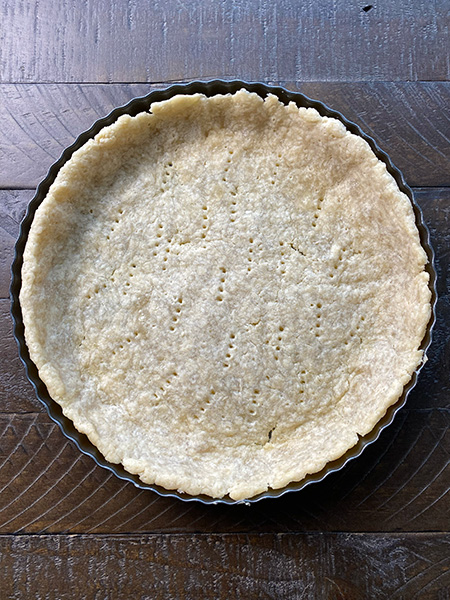
Bake the tart crust for 10 minutes. Remove it from the oven and remove the sheet of parchment paper containing the pie weights.
Place back in the oven and bake for another 5-8 minutes, or until your crust is golden brown. Remove it from the oven and allow the tart tin to cool to room temperature before adding your desired filling.
Tips On Getting It Right
Don’t Over Work
When you are working with pastry dough, including this tart crust recipe, you will want to be extremely careful that you don’t overwork the dough too much. Meaning, don’t play with the dough and don’t overmix the dough.
If you work the dough too much, it will turn out to taste much more like playdough than your delicious tart crust. Let’s be honest, no one wants that! This is why I highly recommend that you don’t mix the dough much, and don’t roll it out too much.
Try the Easy Press-In Crust Method
For those of you who don’t have a rolling pin or are concerned about the tart crust turning out right, I would highly encourage you to try the press-in method.
To do this, you don’t need to roll the dough out ahead of time. Simply grease your pan, then add some of your crumbly dough to the edges of the tart pan. Use your fingers to press the dough in place at the edges.
Place the rest of the dough in the center of your pan and use your hands to start pressing it out so that it is flat. To finish, use a measuring cup, and press the dough flat in the center and around the edges before baking the crust.
Using Pie Weights
Using pie weights or dry beans is a good idea, if you want a seamless baking process. These serve to help hold your crust in place while it bakes. You can bake your crust without them if you need to. You will just want to keep a close eye on it and help reform the crust as it bakes and falls away from the edges of the pan.
Tart Crust Sizes:
Tart pans come in many different shapes and sizes. This recipe will work best for tart pans that are nine or ten inches in diameter. If your pan is larger or smaller, you can still use this recipe, you might simply have a little thinner or thicker crust.
Why the different baking times? Par Baked vs Fully Baked Tart Crust.
If you are looking to partly bake the tart crust, you will want to bake the crust for only the first 10 minutes. Then add your filling and continue baking for a few more minutes.
But if you wish to make a fully baked tart crust, you can follow the instructions above, to achieve the fully baked crust.
How to Store Tart Crust:
To store the tart crust, if it is in use, you can keep it in the fridge. However, if you are making the crust ahead of time, you are going to have the best results if you seal it securely in a plastic freezer bag and freeze it for up to three months.
How to Use The Crust
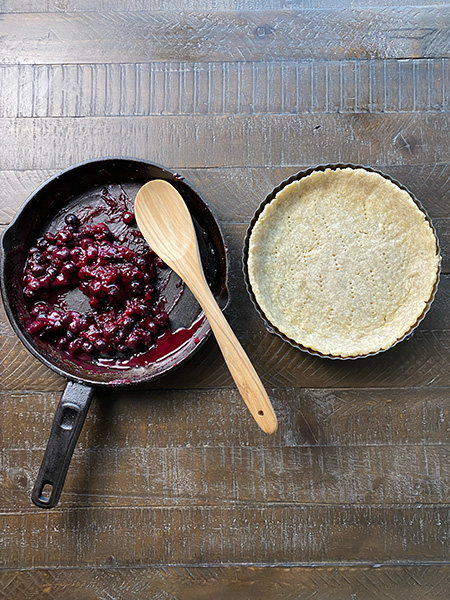
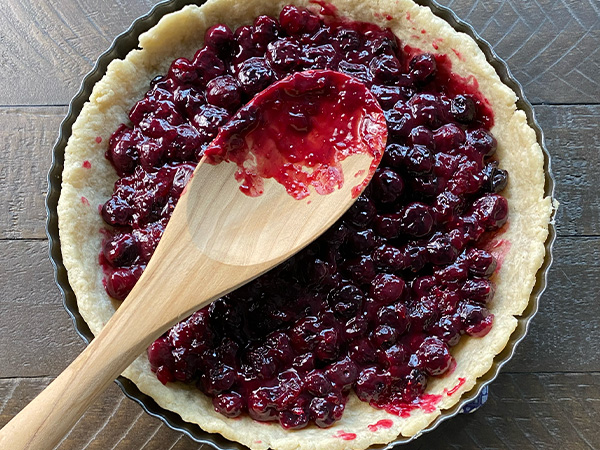
There are many different ways you can use the crust for a homemade tart. You can enjoy both sweet and savory fillings in the crust.
You might enjoy my blueberry tart recipe, to add delicious blueberry filling into the tart. Or you can simply add canned pie filling for a quick and easy dessert. Another delicious way to use the crust is to make a quiche in the crust. Some delicious flavors include lemon tart, chocolate tart, or any kind of fruit filling to make a delicious tart.
How to Serve
You can serve the tart crust with a delicious fruit filling in it or as a quiche. Whatever your preference, there are many delicious options on how to serve this tart crust recipe.
Variations
Sweet Tart Crust
As I mentioned above, there is not only a savory tart crust recipe you can make, but also a sweet tart crust, for those of you who have a sweet tooth.
The recipes to make these two kinds of crusts are very similar. The only difference between the savory and sweet tart crust is that you will decrease the salt content in the sweet crust, as well as increase the granulated sugar, and add powdered sugar. Otherwise, the ingredients and the entire process for making the two types of crust are the same.
Frequently Asked Questions
What size pan can this tart crust recipe be baked in?
This tart crust recipe is best when baked in a 9-inch or 10-inch diameter tart pan.
How long should the tart crust bake?
For this recipe, when you are baking the tart crust, covered in parchment paper, or aluminum foil it is best baked for 10 minutes, then remove the covering and continue baking for another 5-8 minutes, or until it turns a golden brown color. If you wish to only partly bake the crust, you can skip the second baking time.
Can this tart crust recipe be made ahead?
Yes, this tart crust recipe may be made ahead of time. The best way to do this is to make the crust, and then store the unbaked crust in a plastic freezer bag. Then freeze the unbaked crust for up to three months.
Easy Tart Crust Recipe
Now that you know how to make these two different versions of a tart crust, you can begin making your own tart crust, by following these step-by-step instructions.
Thank you so much for stopping by to check out my tart crust recipe! I hope that you will give it a try and that you will enjoy this recipe!
For more posts like this one, follow us on Pinterest, Facebook, Instagram and YouTube.


Tart Crust Recipe
Ingredients
- 1 1/2 cups all-purpose flour
- 1 tsp granulated sugar
- 1 tsp salt
- 1/2 cup cold butter
- 1/4 cup cold water more cold water as needed
- Sweet Version
- 1/2 tsp salt
- 1/4 cup granulated sugar
- 1/4 cup powdered sugar
Instructions
- To make the tart pastry dough, begin by adding the flour, salt, and sugar into your food processor, or mixing bowl. Pulse or mix to combine the dry ingredients.
- Cut the cold butter into cubes, and add it to your mixture.
- If using a food processor, pulse for a few seconds. Just until the mixture has pea sized clumps in it.
- The same applies if you are using a pastry cutter. Cut the pastry dough until your mixture has pea sized clumps in it.
- Slowly pour the ice-cold water into the mixture as you mix. Just until the dough begins to come together. Please note, that you may not need to add all of the ice water.
- Stop mixing as soon as the dough comes together.
- Lightly flour a clean work surface.
- Dip your hands in a little bit of flour, and then pick up your tart pastry dough. Gather the dough into a ball and place it on a lightly floured surface.
- Sprinkle a little more flour on top, and use the rolling pin, to roll the dough flat.
- Spray your tart pan with cooking spray.
- Transfer the rolled dough to the prepared tart pan.
- Press the dough so that it sits smoothly against the sides of the pan. Use your fingers to shape it against the sides of the tart pan if needed.
- Trim off any excess dough that hangs over the top of the pan.
- Press the tines of a fork around the bottom of the pan.
Alternative Press In Method
- Rather than using a rolling pin to roll the dough out before placing it in the tart pan, you can also add the dough pieces directly to the tart pan.
- To do this, you will want to start at the outer edge of the pan, using your fingers to press the crust dough against the ruffled edges of the pan.
- Once you are happy with your edges, add the rest of the pastry dough to the center of the pan. Start by using your hands to press the center flat. Then to finish, use a measuring cup bottom to press the bottom of the crust nice and flat.
- To finish the press-in method, poke the bottom of the crust using the tines of a fork.
- Preheat the oven to 350°F.
- Cover your prepared tart crust with parchment paper, and place pie weights or if you don’t have them, dried beans, over the sheets of parchment paper to help hold the crust in place as they bake. Set the tart pan on a baking sheet.
- Tip: if you don’t have pie weights or dried beans, you can bake it without the filling. You will just need to keep a close eye on it so that the edges don’t fall away from the pan. If you see it start to get misshapen, remove it from the oven and use a fork to fix the crust. Put it back in the oven to continue baking.
- Bake the tart crust for 10 minutes. Remove it from the oven and remove the sheet of parchment paper containing the pie weights.
- Place back in the oven and bake for another 5-8 minutes, or until your crust is golden brown. Remove it from the oven and allow the tart tin to cool to room temperature before adding your desired filling.
PIN for Later!